This is a new topic in 12.03.
This is a new topic in 12.04.
Content highlighted in yellow is new in 12.03.
Content highlighted in blue is new in 12.04.
Creating a User Linked to ERP+
Ensure ESB Broker is Active
ESB Broker must be turned on otherwise the account request will not be sent to POP Apps.
- Open System > ESB Start Stop > ESB Send.
/Creating Users.png)
- Ensure that the COINSAppStudio broker has active status (green circle in the status column). If not, click the START button.
Create a COINS ERP+ User
- Open System > User Maintenance > Users.
- Click the
/OA Add button.png) button.
button./Creating Users_1.png)
- Complete mandatory fields (User, Prime Group, Companies). Complete any optional fields if you wish.
- Click
/OA Save button.png) .
.
Add User to Personnel and Send Account Request to CCC
- Open Central Repository > Personnel.
- Click the button.
/Creating Users_2.png)
- Enter the user ID in the Userid field (the username you entered when creating the user in User Maintenance).
- Enter a name and family name under Details and enter an email address under Work Information. Complete any optional fields if you wish.
- Under Application Studio, tick the Activate box. This is what will send the account request to CCC.
- Underneath the Activate tick box, enter an ID for the user. This will be the user’s username in CCC. Do not include spaces.
/Creating Users_3.png)
- Click . The account request has now been sent to CCC.
Accept the Account Request in CCC
- In the Administration module, open User Administration > Account Requests.
- Right-click the account request, or left-click the request and click the menu icon
/Menu icon.png) , then click Manage Account Request.
, then click Manage Account Request./Creating Users_4.png)
- Edit the first name and last name if necessary, then click
/Save and Next button.png) . The user has now been sent an email containing a link to activate their account.
. The user has now been sent an email containing a link to activate their account./Creating Users_5.png)
Add User Groups to User
The user groups assigned to a user determine which apps, and which user roles within those apps, the user has access to. If you left the Open Manage User Groups On Completion box ticked when accepting the account request, you will automatically be taken to the Modify User Groups window for that user. Otherwise, to get to this window:
- Open User Administration > Users.
- Right-click the new user, or left-click the user and click the menu icon , then click Modify User Groups.
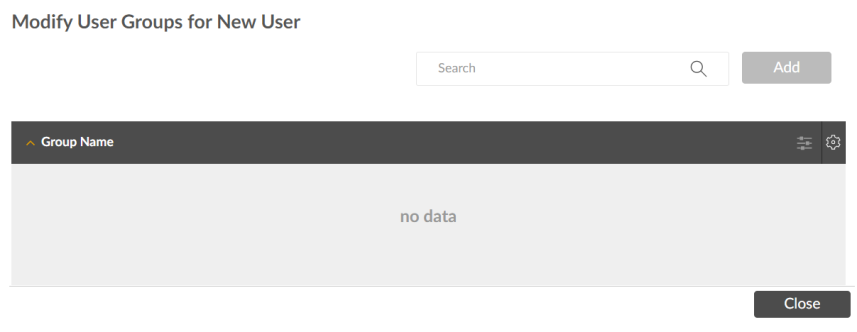
To add a user group:
- Click the search bar to open a drop-down list containing every available user group.
- Tick the boxes next to each user group you wish to add to the user. You can enter a search term to narrow the list if necessary.
- Click
/Add button.png) to add the selected group(s) to the user. They will appear in the grid below.
to add the selected group(s) to the user. They will appear in the grid below.
To remove a user group:
- Right-click the user group you wish to remove, or left-click the group and click the menu icon , then click Remove From Group. You will receive a popup message asking if you are sure.
/Creating Users_7.png)
- Click
/Delete button.png) to confirm.
to confirm.
Set and Publish Company and Contract Security in COINS ERP+
Company security:
- Open System > User Maintenance > User Workbench.
- Click the Open button
 next to the user for whom you wish to set security.
 - Enter values for the Companies field. To block access to a specific company, enter an exclamation mark before that company. If you are entering multiple values, separate them with a comma. Enter an asterisk to grant access to all companies.
- For the changes to be published, ensure the Named User tick box is ticked for the user.
- Click the Save button
 to save the security.
Contract Security:
- Open the required kco > Contract Status > Setup > Setup Maintenance > Security > Contract Security.
-
Click the Open button
next to the user for whom you wish to set security. -
Enter values for the Security List field. The JOBSEC parameter controls how Security List values are processed. For example, if it is set to jcl_loc, entering “ABC” will grant the user access to all contracts with location “ABC”. To block access to contracts from a specific location, enter an exclamation mark before that location, e.g. “!ABC”. If you are entering multiple values, separate them with a comma. Enter an asterisk to grant access to all contracts.
-
Enter values for the Code field. These are the contract numbers of individual contracts you wish to grant the user access to. To block access to a specific contract, enter an exclamation mark before that contract, e.g. “!LB01”. If you are entering multiple values, separate them with a comma. Enter an asterisk to grant access to all contracts.
-
Click the Save button
next to the user to save the security.
Contract security is set per company (kco). Repeat these steps for each required kco.